Implementing MASH in a Character Rig
A few months ago, I was doing some research into solutions for automating some secondary motion on our characters. One path led me down watching some MASH videos on YouTube. Ian Waters’ channel is full of great stuff. It got me wondering if a MASH network could be used in a character rig to drive some dynamic motion where needed. Well, turns out it can! I got back into it last week and did a test which got a good amount of interest on Twitter, so I decided to do a quick (and probably a bit dirty) writeup on the subject.
NOTE: This was all done in Maya 2017 Update 5. I haven’t confirmed that these instructions work or are exactly the same in 2018/2019. In this example, I’m just using a basic FK rig with ten links in the chain. Yeah, yeah… it’s not a character. But the same principle could apply to any part in your character rig: a ponytail, an actual tail, cloth, wings, etc…
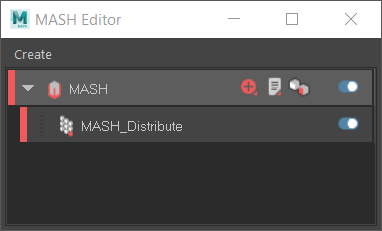
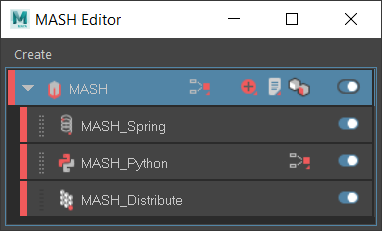
The first thing to do is to create a new MASH network. From the MASH menu (within Animation) open the MASH editor, and from the Create menu, choose ‘Create MASH Network’. This will create the MASH node and the Distribute node. Select the MASH_Distribute node and set the ‘Number of Points’ to match the number of controls (in this case ten). Set the ‘Distribution Type’ to ‘Initial State’, as we’re going to have the control rig drive the initial point position.
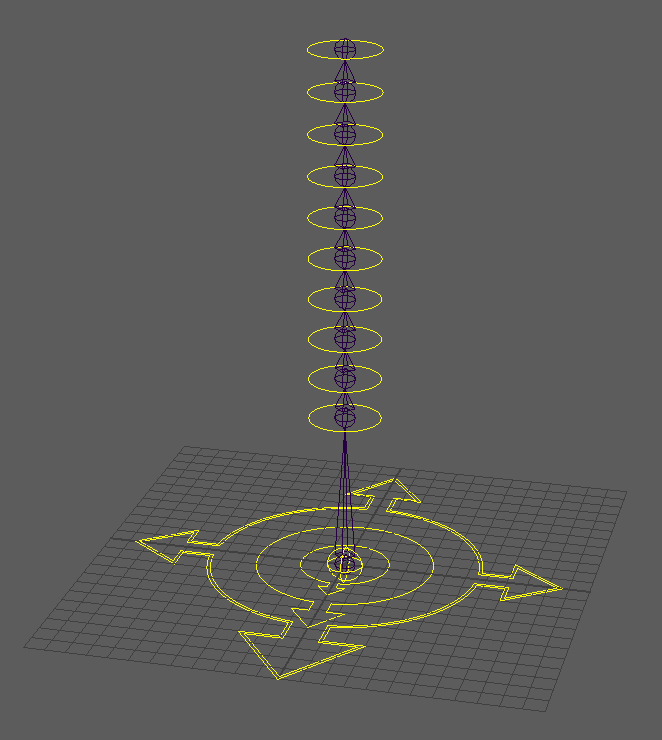
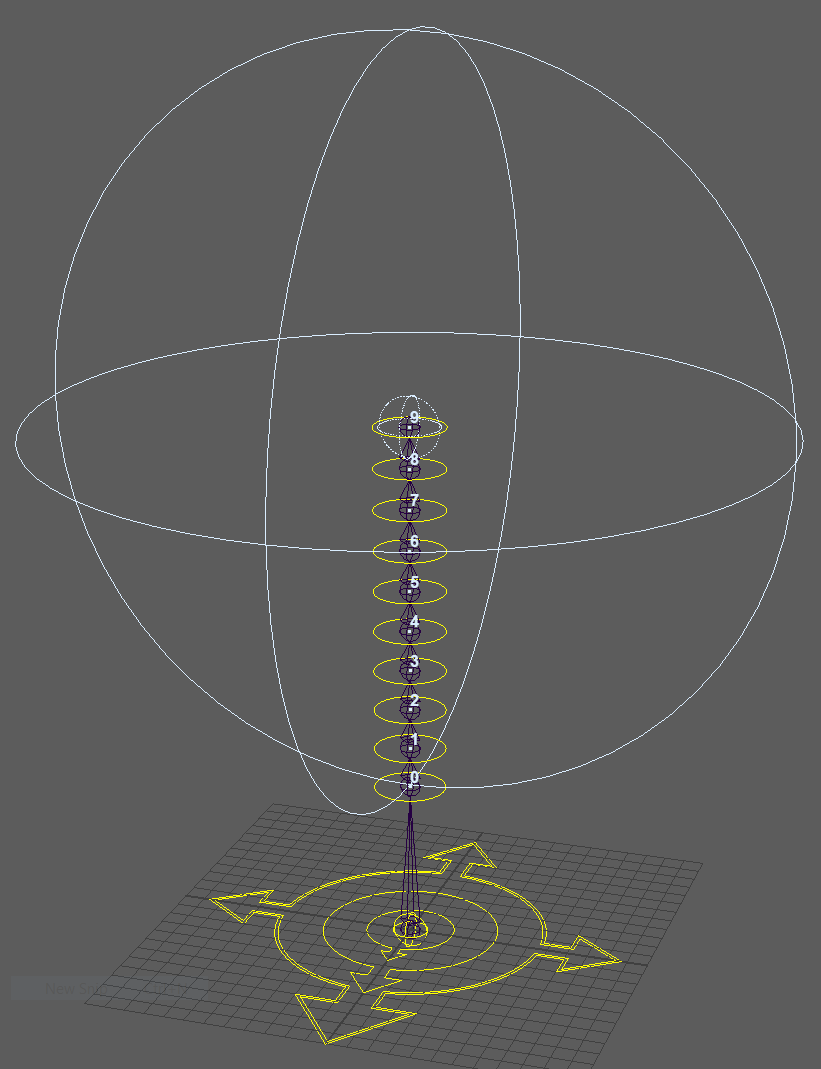
Next, expand the ‘Initial State’ dropdown. Select all of the rig controls and middle mouse drag from the outliner to the ‘Initial Transforms’ list. To verify that the points in the system are placed where we expect, add a ‘Points’ utility for debugging purposes. That can be found by selecting the top MASH node in the editor, and within the ‘Add Utility’ dropdown, click ‘Points’ and ‘Add Points Node’. The newly displayed points should line up with the specified rig controls.
Now we can go ahead and add in the Python node to the system. Select the top MASH node in the editor and click ‘Python’ and ‘Add Python Node’. This should place a ‘MASH_Python’ node above the distribute node. Before we get to the actual code, we also need to place a falloff node, which the code uses to drive the amount of influence on each point in the system. Select the ‘MASH_Python’ node in the editor and expand the ‘Falloff Object’ dropdown. Right-click within the ‘Falloff Objects’ list and click ‘Create’. Snap the position of the falloff node to the last control in the chain along with making it a child of that last control. Scale the node so that the outer sphere reaches the first control/point in the system. Adjust the ‘Inner Zone’ of the falloff node so it roughly surrounds the last control/point. See below for an example.
Now it’s time for the code. Copy and paste the code below over the existing code found on the ‘MASH_Python’ node. Be sure to execute the new code by pressing the blue triangle above the code editor. The TL;DR here, is that for each point, we’re storing a list of transformation matrices which is built up from the current transforms of each frame as the animation is played/scrubbed. Each point’s transform is ultimately set by backtracking in the list based on its current index in the list and the specified frame delay. Assuming no errors were encountered on executing the code, we should now be able to animate the control rig and see the debug points lag behind.
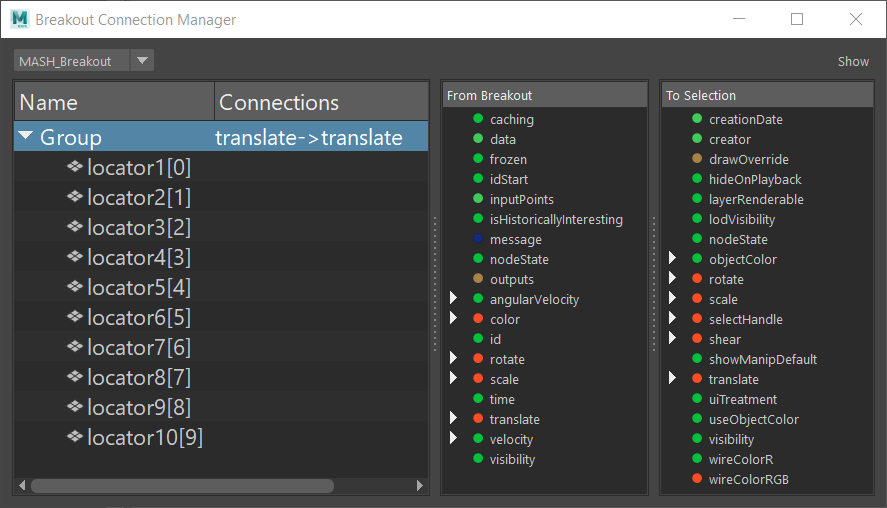
So now that we’re properly driving the point’s behavior through code, we need to actually get that data onto some nodes in the scene. In this example, we’ll feed that data to a locator for each control/point, so create ten locators (don’t need to be parented to one another). The network’s data can be passed to these locators by adding a ‘Breakout’ node to the MASH network. Select the top MASH node in the editor and within the ‘Add Utility’ dropdown, click ‘Breakout’ and ‘Add Breakout Node’. Similar to what we did for the initial state, select and middle mouse drag all of the locators (new locators, not the original rig controls) to the ‘Connected Nodes’ list of the breakout node. Doing so should bring up the ‘Breakout Connection Manager’ window. With the top group selected, choose translate within the ‘From Breakout’ list and translate within the ‘To Selection’ list. Now all of the points in the system will drive the location of the locators.
The delay alone feels a little bit rigid, so for the final network, we’ll also add a spring node. The default values within the spring help with some nice overlap and settling.
In the final example below, the original bind skeleton was duplicated and aim constraints added to look at the next locator down the chain. Translation could also be piped in if we wanted to add some stretch to the system. It really all depends on the look which we’re trying to achieve in the end.
I’m really liking this solution so far, as it feels pretty flexible with the ability to have complete control over the points in the system through code, and the ability to stack multiple behaviors within the network is nice as well. With the control rig driving the initial state of the network, it can still be posed and animated freely. The points in the network will try and conform to the rig (depending of course, on your delay and spring settings). The falloff nodes could even be animated to give you exact control over the influence of the points when and where you need it. Hopefully, this quick little tutorial has helped. Please hit me up if you’ve got any questions!